Photobucket

Sunday, March 4, 2012

DIY Valance


I've been working on my kitchen for a few months now.  Several years ago while browsing one of my favorite blogs Design Dazzle I ran across this tutorial for a valance, you can find the tutorial here

Let me tell you, this is one of the easiest things I have ever done!!  In fact, I've made several of them for my house.  They are great because it allows you to make whatever you want (size and all) plus will fit any decor. I purchased the foam core board from Hobby Lobby as they have huge sheets of this stuff for cheap. 

This was just white with black trim, which I already loved.  But the more I looked at it, I thought it needed something.  So, I once again went to my Silhouette sat down and attempted to figure out what I could do.  I decided that it needed a monogram.  At that point, I went to my fabric stash and found some black fabric, used the clean cut fabric interfacing, and cut out the monogram.  Then ironed it on to the valance. 


I LOVE it!!!!  In my opinion, just what it needed! :)

I'm linking up to these fabulous parties!!
/>The Girl Creative
Keeping It SimpleThe Southern Institute


A Marvelous Mess

I Heart Nap Time


Design Dazzle
Our Delightful Home
One Artsy Mama
ll


Design Dazzle
Tip Junkie handmade projects
shabby creek cottage Weekend Bloggy Reading HookingupwithHoH

I was featured!!


I was so excited to find out yesterday morning that my Burlap Monogram Canvas was featured on Tatertots and Jello!!  This happens to be one of my most favorite blogs.  I've been following it for a while now and have found many projects on there.  If you haven't visited it is awesome, so stop by!!!


Actually, immediately after I posted this, I found that my Side Table Redo was featured at Sisters of the Wild West also!!!  Needless to say, I'm excited.  They have some pretty awesome projects as well.


Thursday, March 1, 2012

Side Table


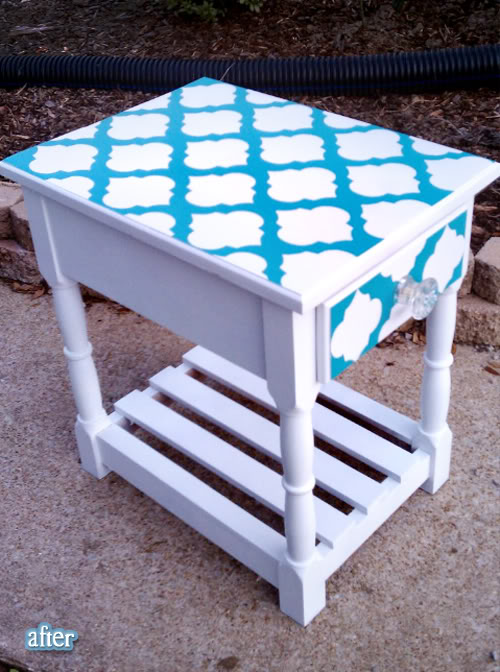
I found this side table at a thrift store for $7.00 and thought it would be perfect for me to practice on.  Considering I have never refinished a piece of furniture in my life....  I think it turned out great.  At that point, I didn't realize that I needed to take pics to show what I did during the process. 

So, this is where I tell you.  First, I purchased a sander because I knew that it was needed and that it would be used for other things as well.  Then, I sanded the entire piece with 80 grit sand paper.  At that point, I moved up to 110 grit and once that was done, I finished up the sanding with a 220 grit.  I was told that the 220 should leave a very smooth finish, which it did! 

Then, I filled in all the holes with wood filler, let that dry over night and sanded again.  I decided I wanted to use a drawer knob instead of a pull so I drilled a hole in the middle of the drawer for that.  Once all of this was done, I completely wiped down the table with a wet rag and let it dry over night.

For the paint, I used white spray paint.  I knew that I wanted a pattern and love this one.  So, I cut it out (with vinyl) on my Silhouette, placed piece by piece on the top and the front of the drawer.  Then I sponge painted on the turquiose paint (two coats), let that dry over night and then peeled off the vinyl design.  The final touch was putting the crystal knob on. 

I love it!!!  It it currently in my living room!

Here's the before and after....


I am linking up to some of my favorites!


The Girl Creative


Photobucket
The 36th AVENUE
Weekend Bloggy Readingkojodesigns
Design Dazzle


Decorating Insanity
I Heart Nap Time
The Southern Institute


shabby creek cottage HookingupwithHoH